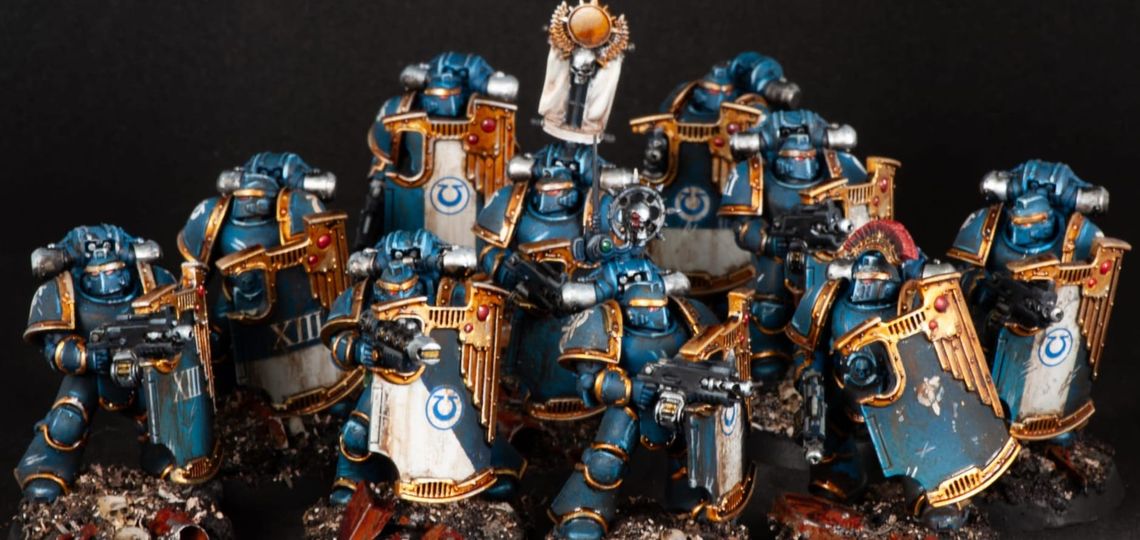
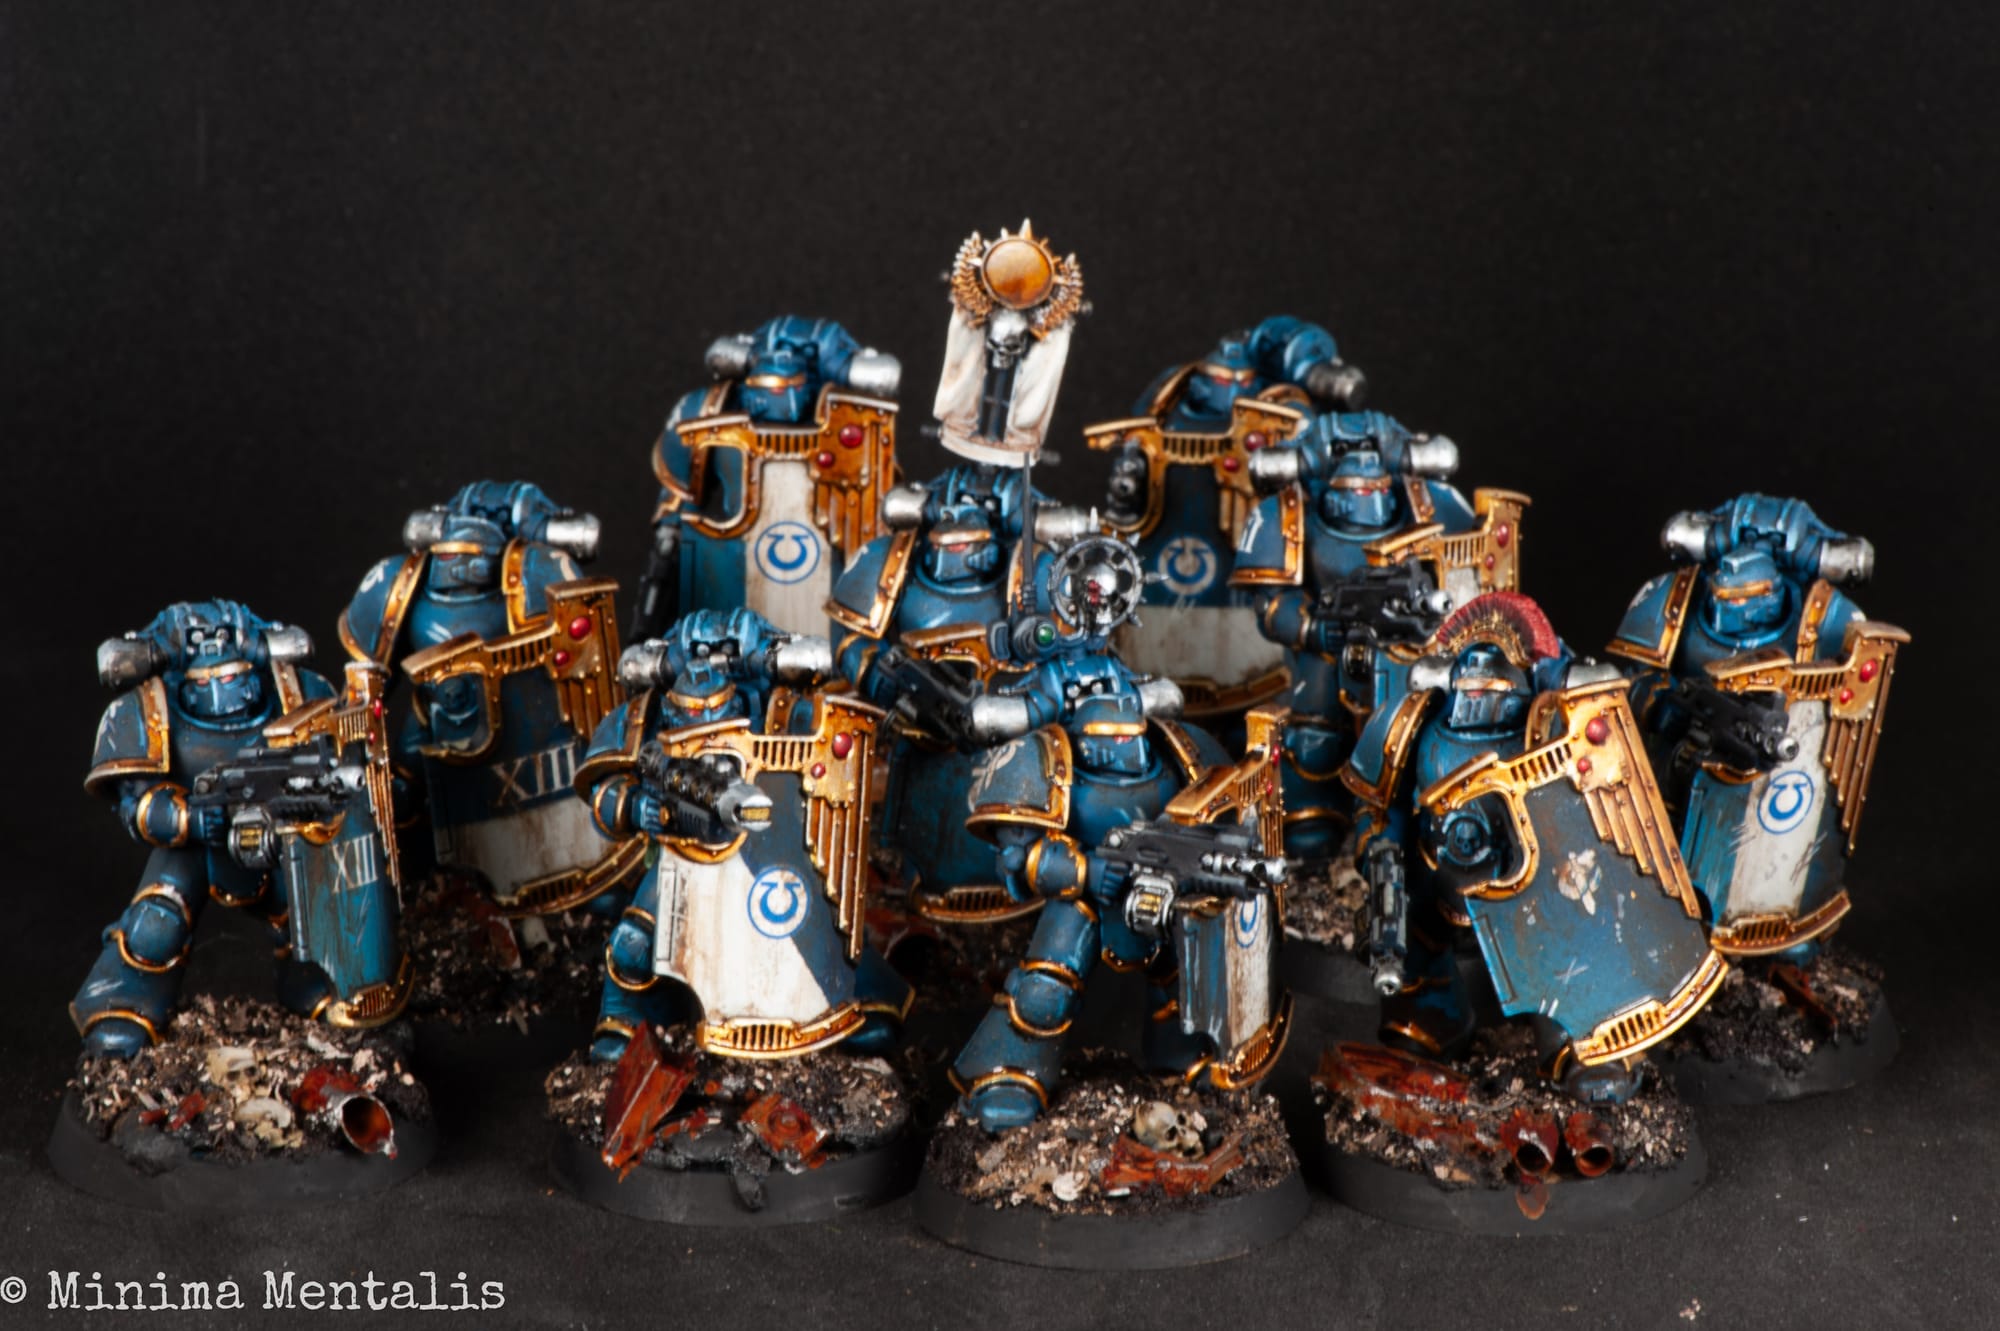
In this guide, I'm sharing my recipe for Horus Heresy Ultramarines, in a dark blue and heavily weathered scheme.
Blue Armour:
I start off from a black primer coat.
First base coat on the blue armour is Vallejo Model Colour (VMC): Dark Prussian Blue, applied overall with an airbrush.
To build up highlights, I load two separate airbrushes with Prussian Blue and Andrea Blue. The first pass highlights are done with Prussian Blue followed by a tighter application of Andrea Blue. Returning to Prussian blue, I glaze over the brightest highlights to knock them back. I repeat this process until the desired effect is achieved. Using two airbrushes speeds up the process, making it easier to make adjustments with the other colour. This reduces the need for as much accuracy at each step.
Decals:
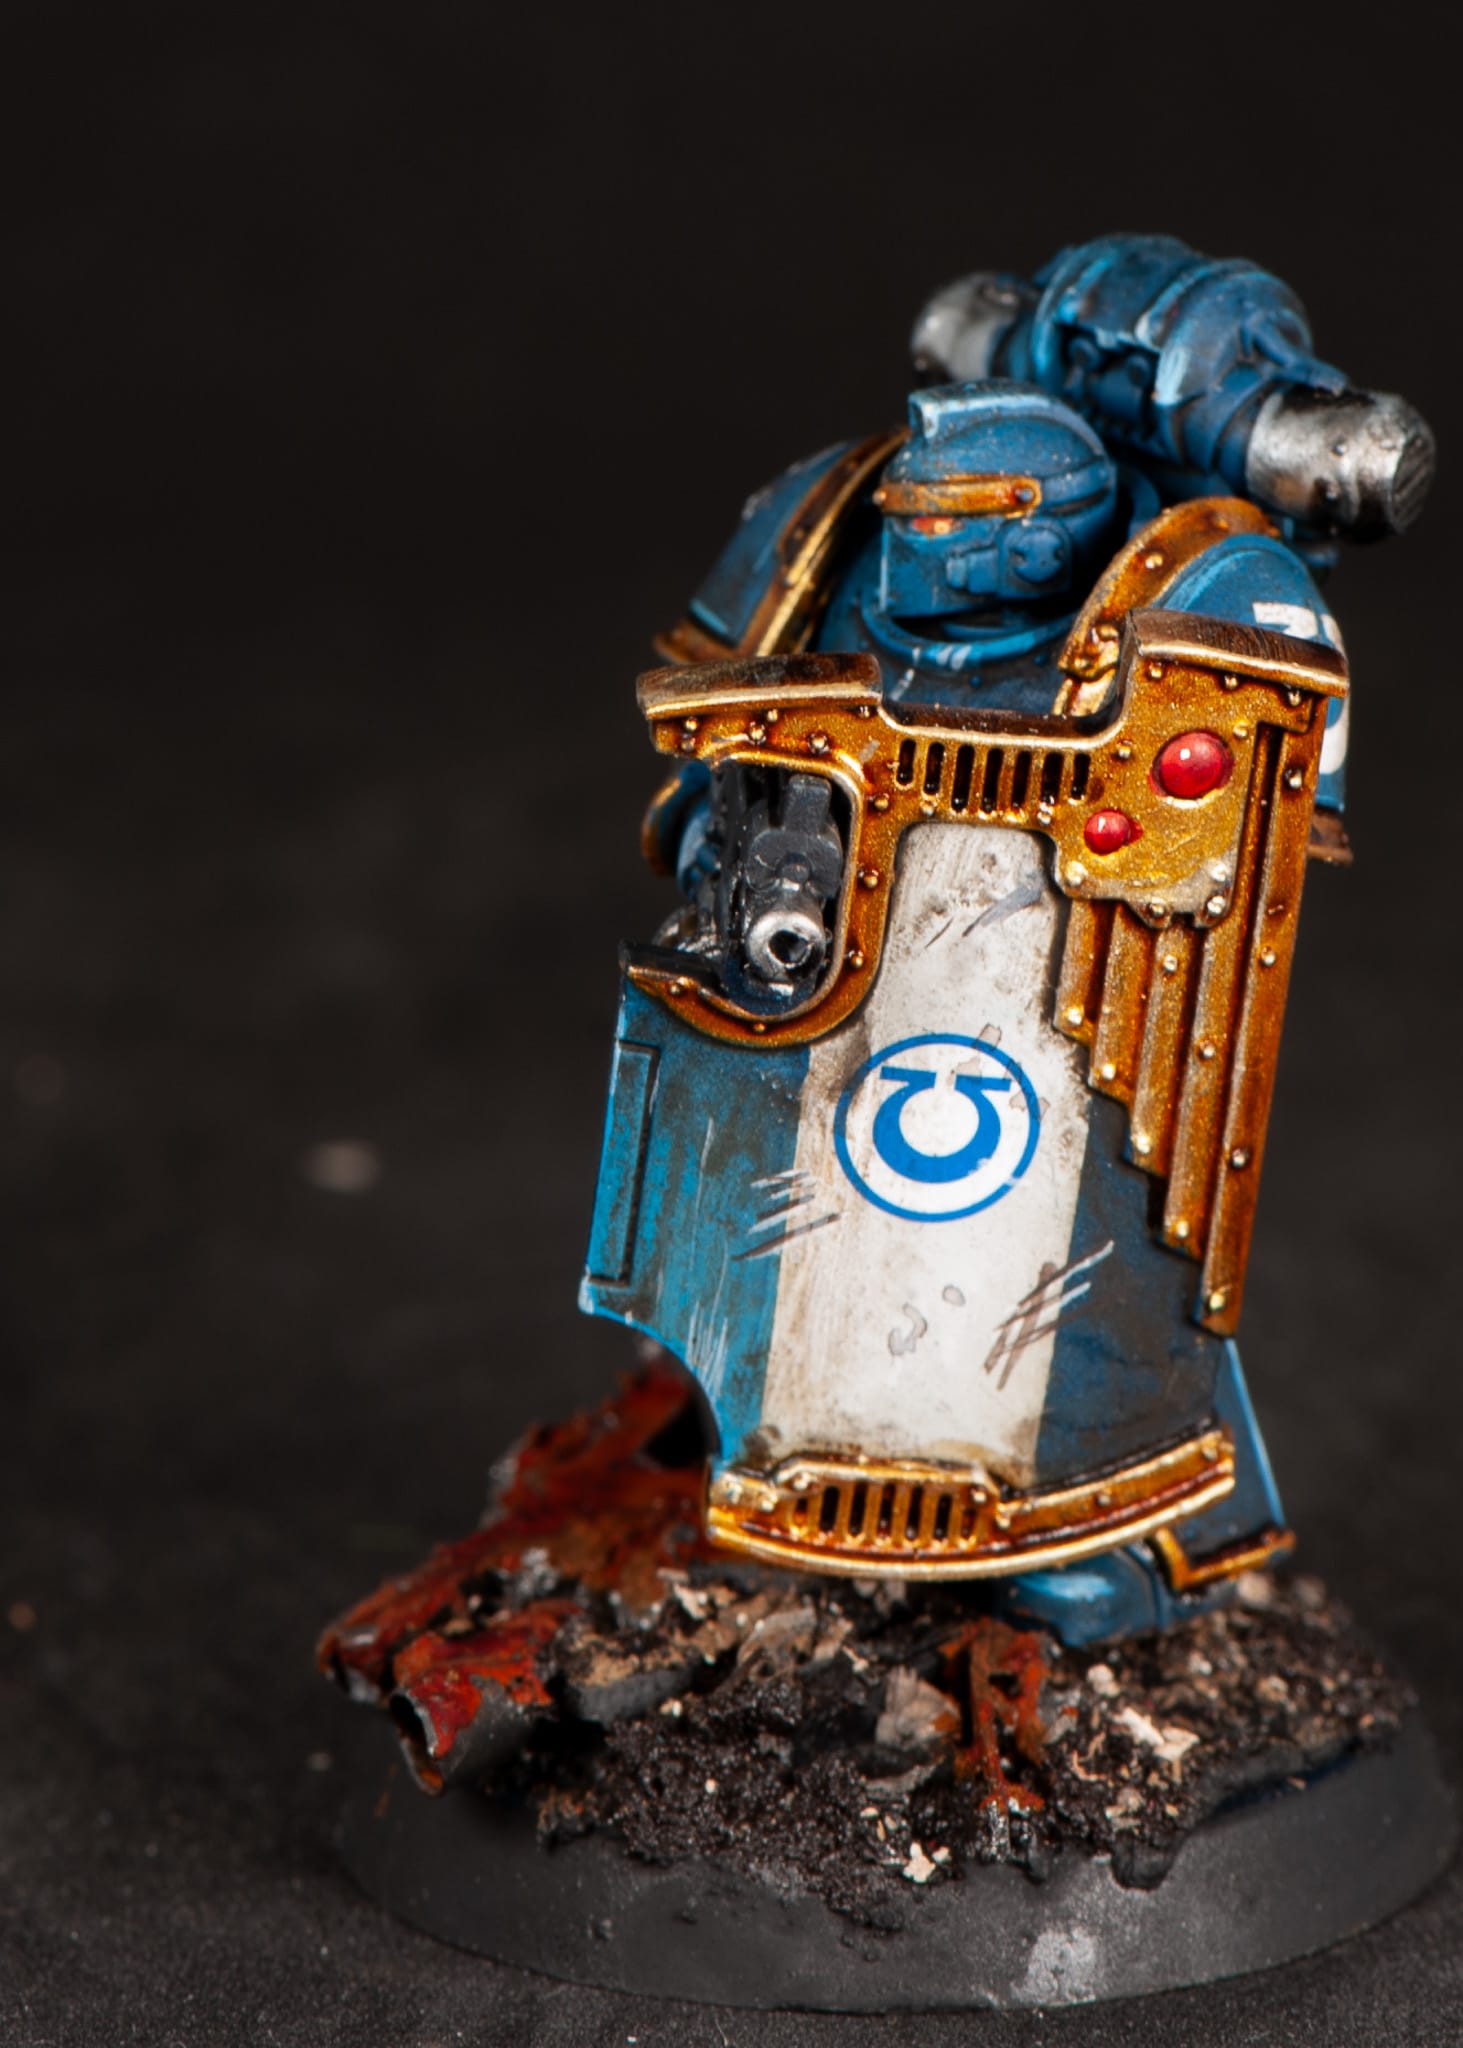
Next, I apply the decals. This is done before weathering to create a realistic look. Plus, working in this order saves an extra protective varnishing round.
Before applying decals, I coat the entire model in a gloss varnish. This creates a smooth surface for decal application and protects the earlier work from the decal softener. For decal application, I use Microset and Microsol. The Ultima symbol on the shoulder pad, in particular, requires a proper decal softener like Microsol to conform to the surface.
After the decals have settled and dried overnight, they get another protective gloss coat over.
Weathering the armour:
Next up is weathering, using oil paints.
Thinned oil paints are ideal for weathering because they flow easily into recesses, unlike water’s surface tension. Furthermore, oils offer almost limitless manipulation on a miniature’s surface allowing for a long working time to achieve the perfect effect. For this work, I prefer traditional oil paints with a thick body over specific oil-based weathering washes. I prefer thinning them to my desired consistency and their long palette life. However, scale modelling weathering washes can certainly achieve the same effect.
The obvious downside to oils is their incredibly long drying time, which can take days. Additionally, you’ll need turpentine or white spirit to thin and clean them. This lengthy drying period is simply a factor to consider when planning your painting project and ensuring you have suitable batches ready.
I begin with black, thinned to a wash consistency using white spirit. I apply it all over the model, ensuring I catch every recess and joint. The armour is then washed with two brown tones: Brown Wash and Dark Mud from Abteilung 502. Any suitably coloured oil paints will work. The application can be quite liberal as the next step involves using white spirit to remove the excess.
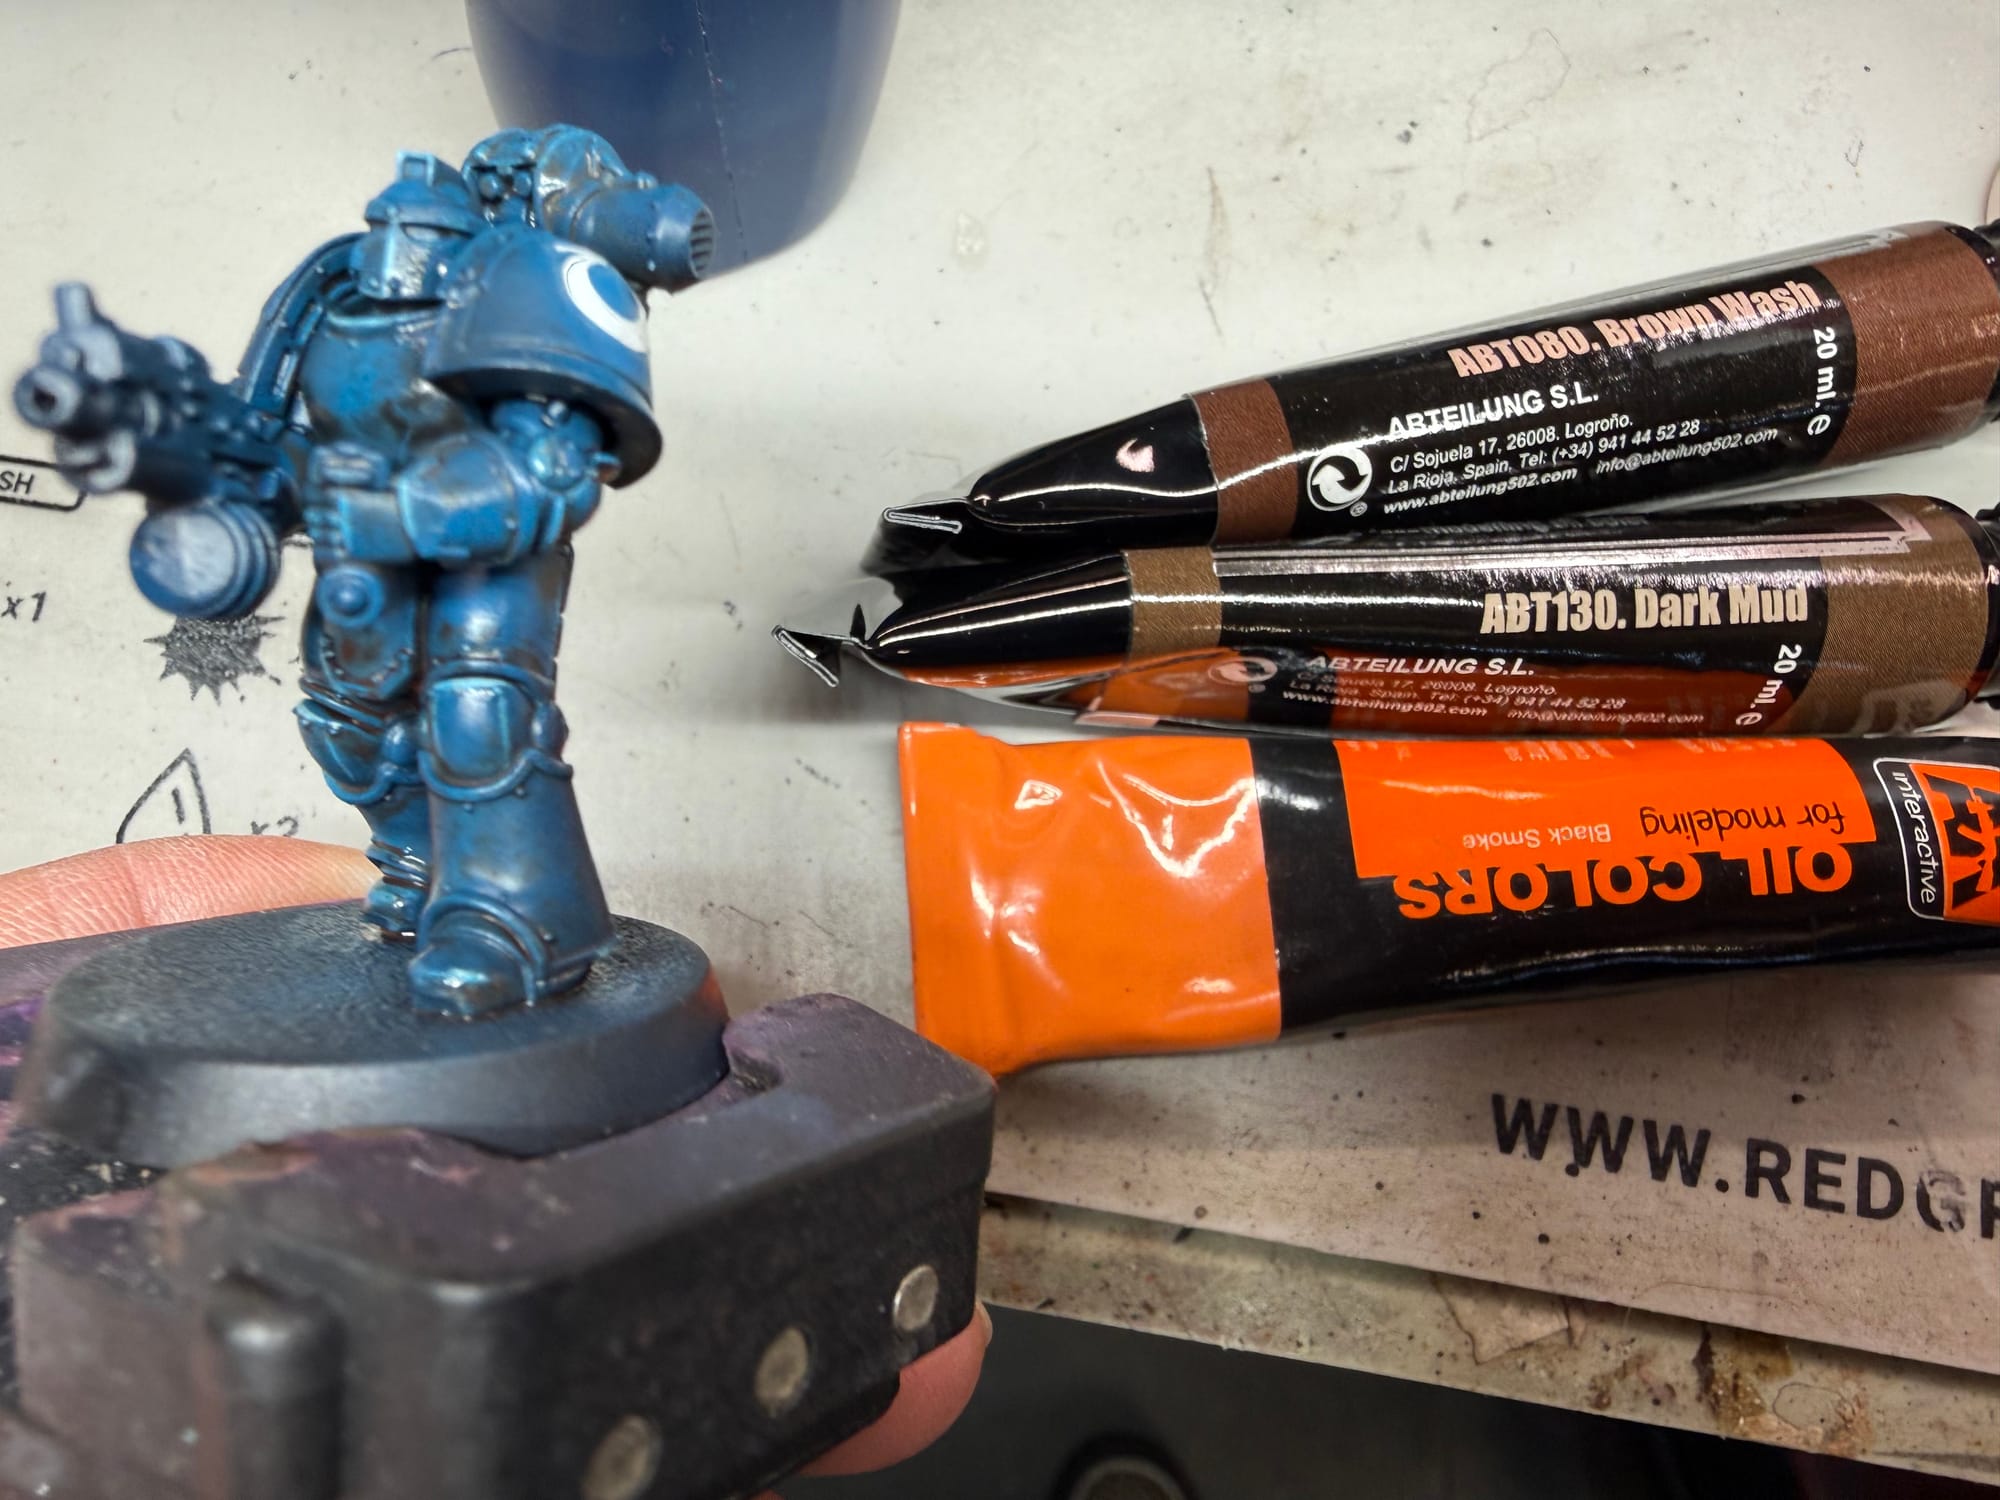
After letting the oils dry for about 15-20 minutes, I remove excess paint with an old brush dipped in white spirit. This is the fun part – moving the pigment around and imagining how their armour became so grimy. Once applied, the oils require a long drying time. I usually leave them for several days before applying a matt varnish coat to prepare for the next stage.
Armour highlights and chipping:
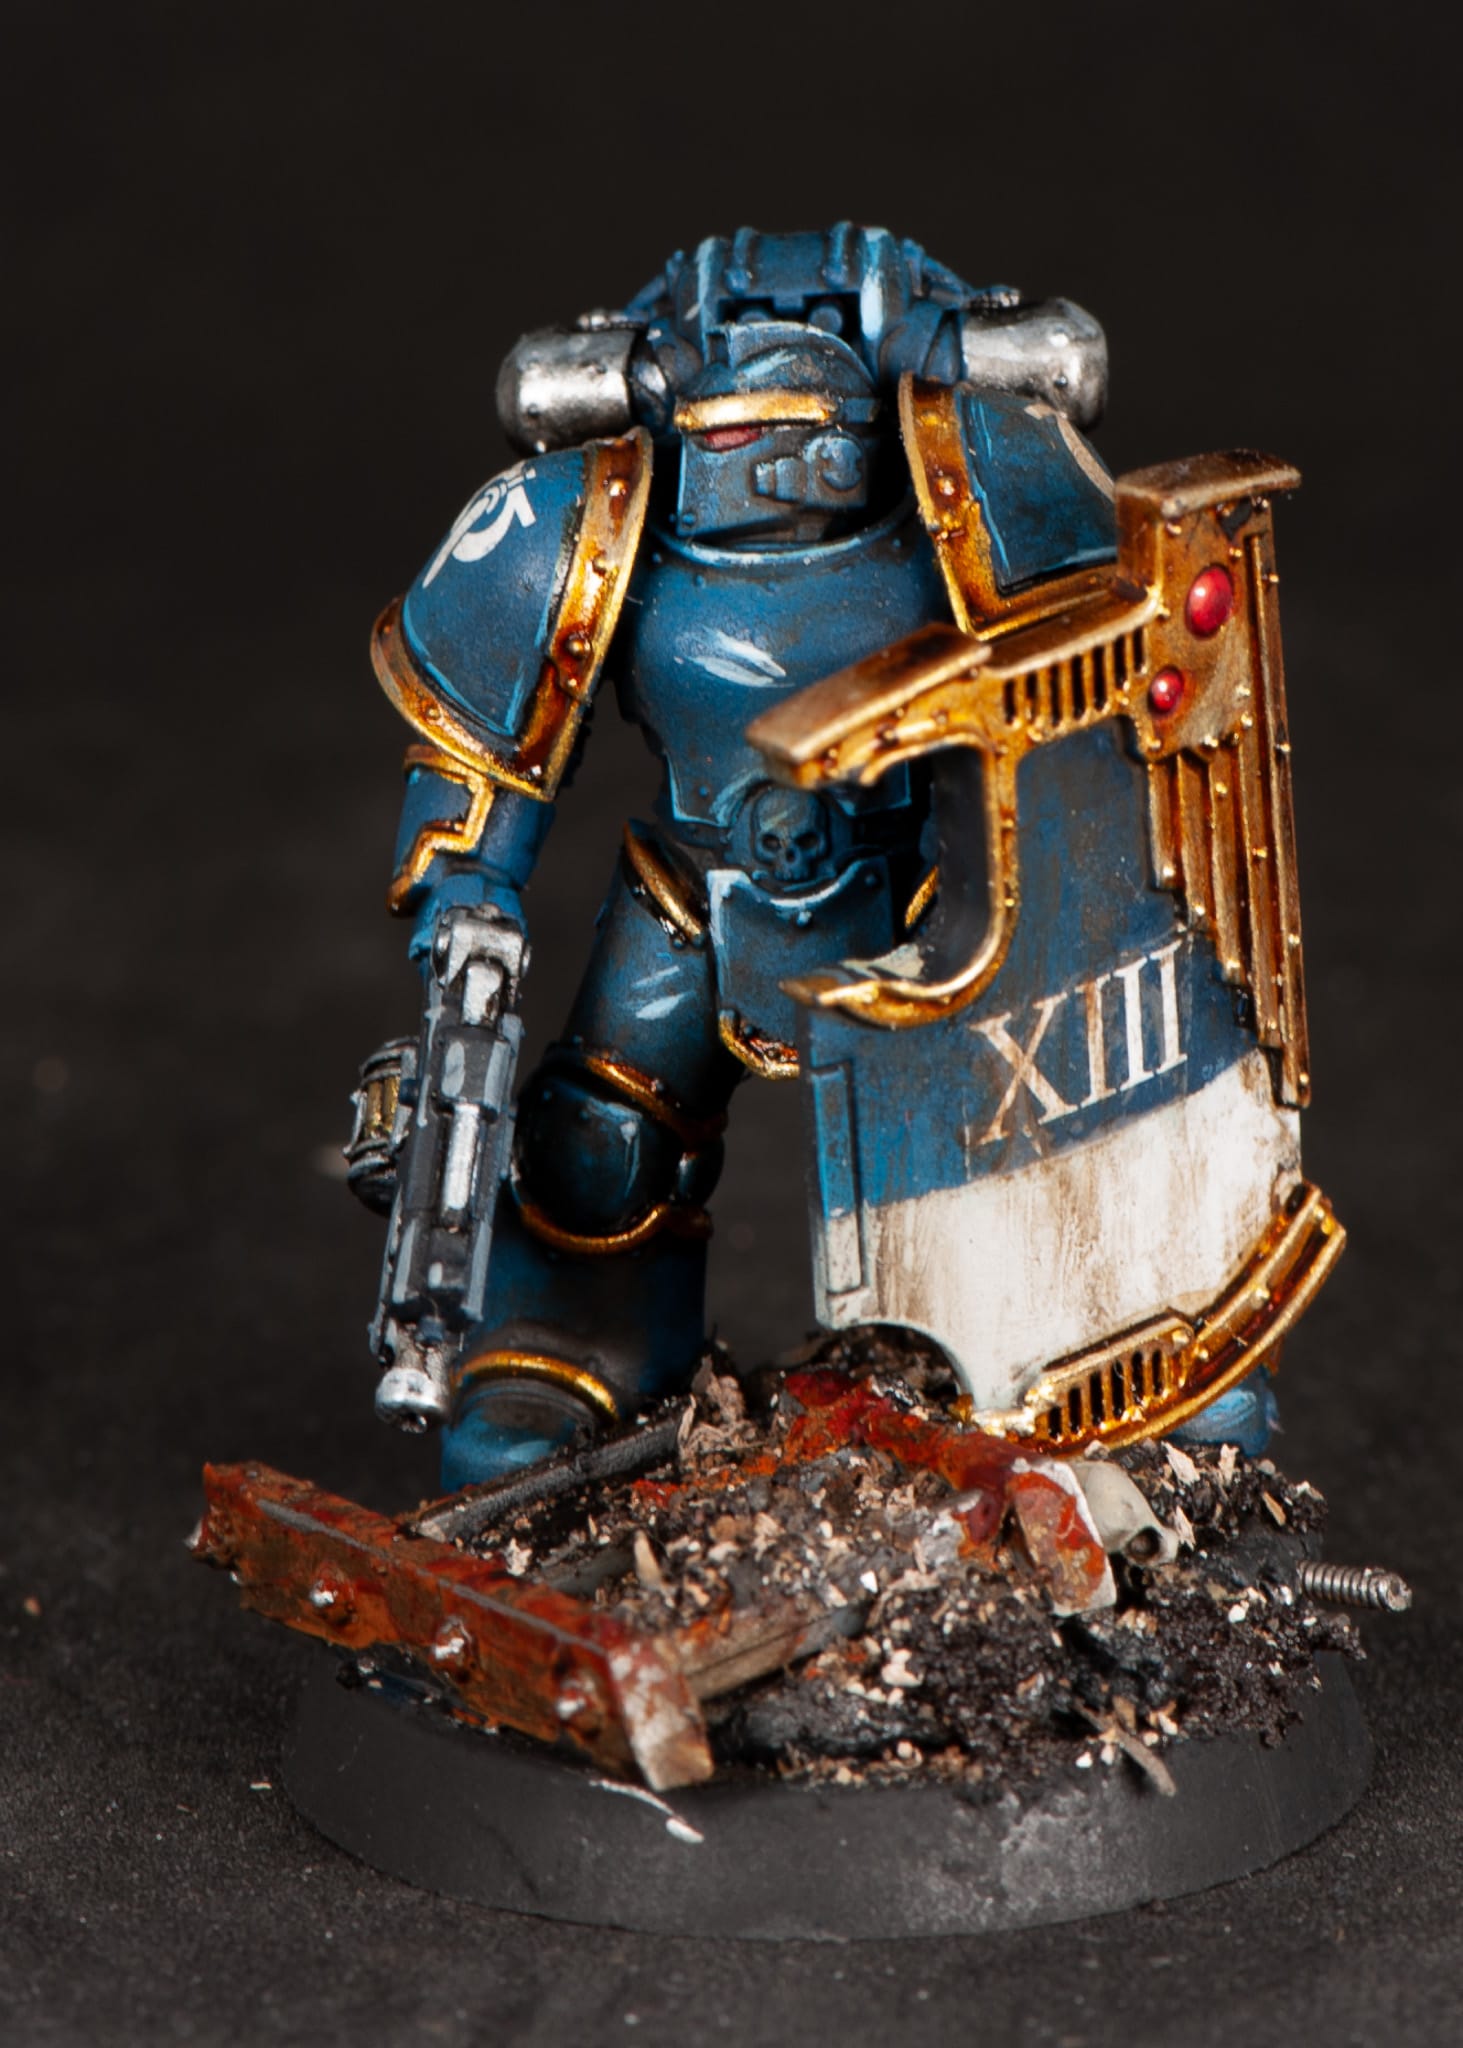
Contrary to the advice of scale modellers, I chip after weathering. This is purely a time-saving trick. I only add the necessary chipping and highlight the spots that need it, avoiding any work being covered by heavy weathering. For the armour edge highlights, I return to Andrea Blue (the final airbrush highlight) and use VMC Sky Blue for the brightest spots. The same colours plus off-white and dark brown are used to add chips and scratches to the armour.
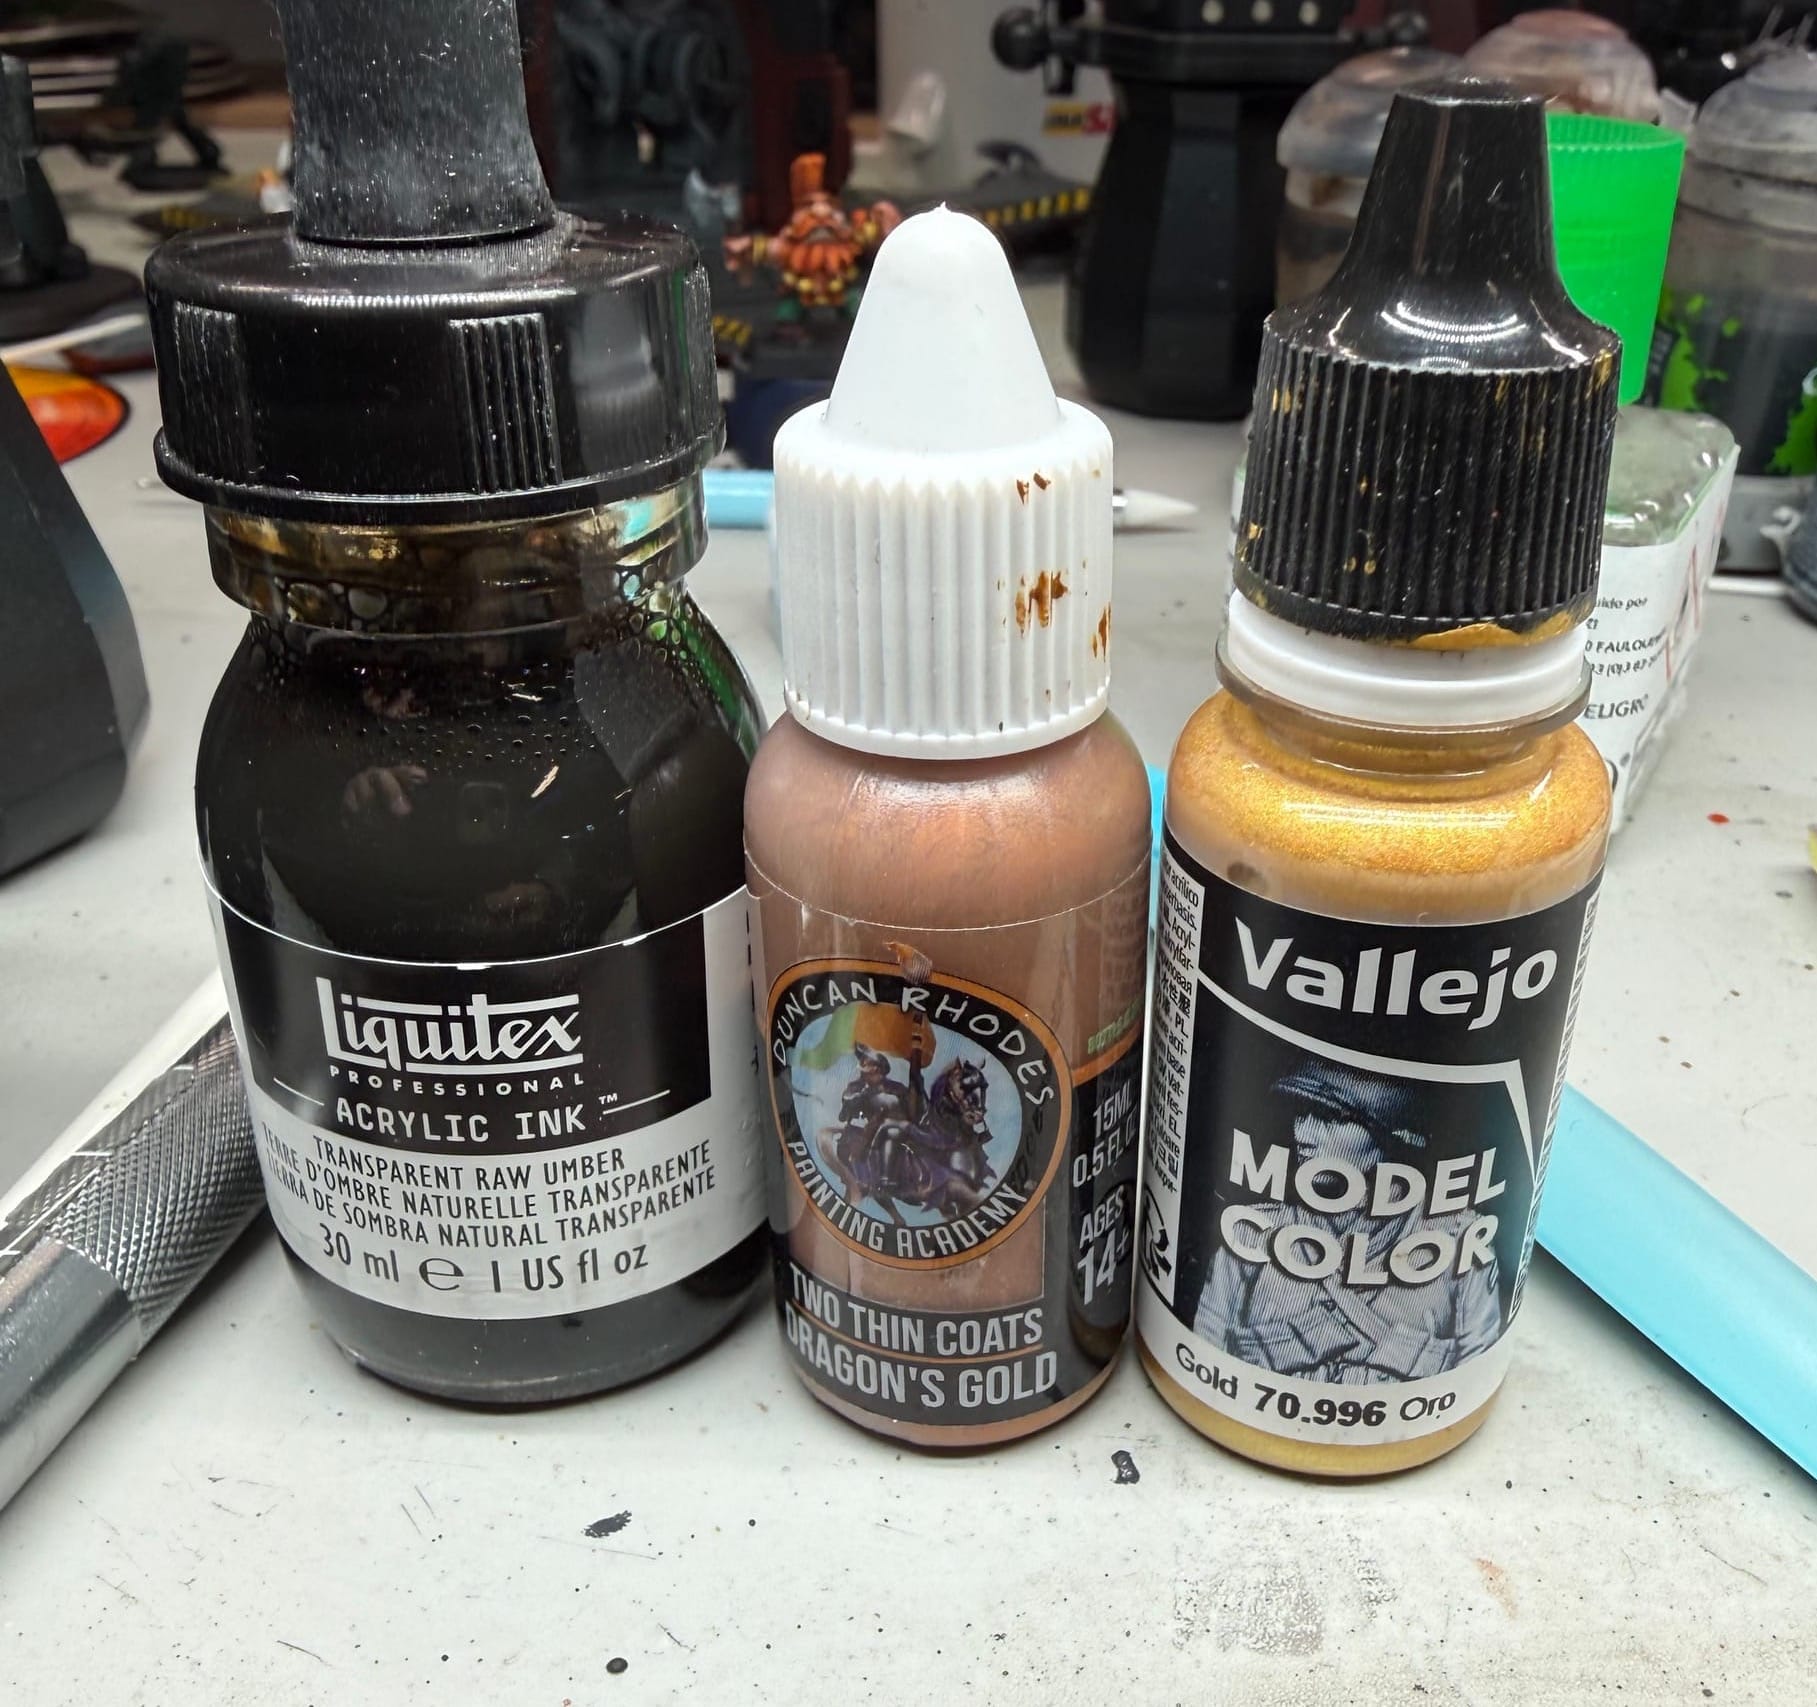
Gold:
The gold adds a regal feel to Ultramarines. I chose a very yellow gold to subtly differentiate from my Blood Angels and create a strong contrast with the deep blue.
The base coat is Two Thin Coats Dragon Gold. Next, I apply a wash with Liquitex Transparent Raw Umber ink. These artist’s inks are incredibly rich in pigment, providing that deep contrast without dulling the metal like typical wargaming washes or Contrast/Speed paints. Once the ink is dry, I make minor touch-ups with Dragon’s Gold and highlights using VMC: Gold, another lovely, but a step brighter, yellow gold.
Finishing touches:
Weapons, accessories, backpack and helmet lenses are painted to finalise the miniature.
The lenses on helmets and the breacher shields are simply done with a white base coat and Flesh Tearers Red Citadel Contrast paint applied over as a translucent coat.
Silver-coloured metal is finished with Pro Acryl Silver and then washed with Liquitex Black Ink. This process doesn’t dull the metal but creates very distinct shades and strong contrast.
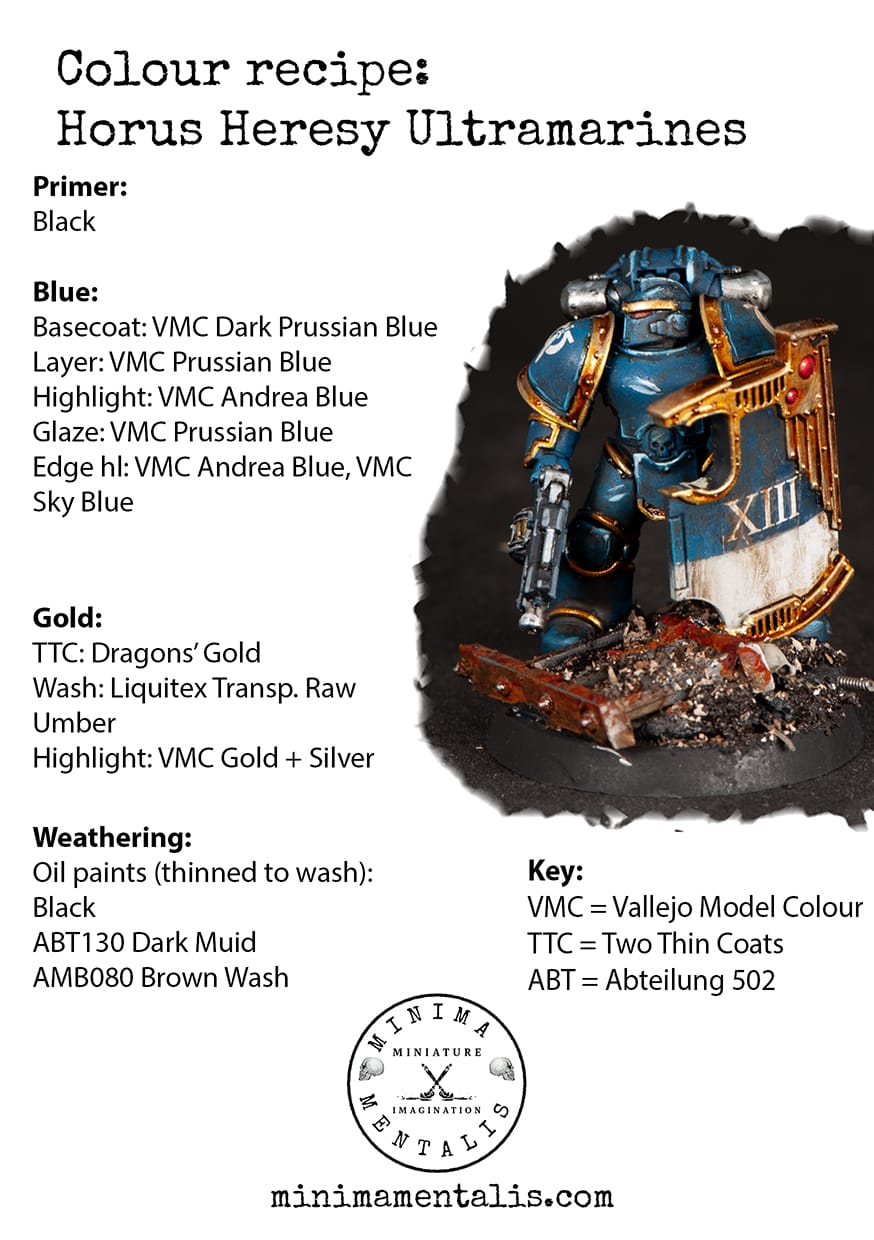
Recipe reference:
Below is the colour recipe as an image that can be saved or printed for personal use. I hope you found this guide useful!