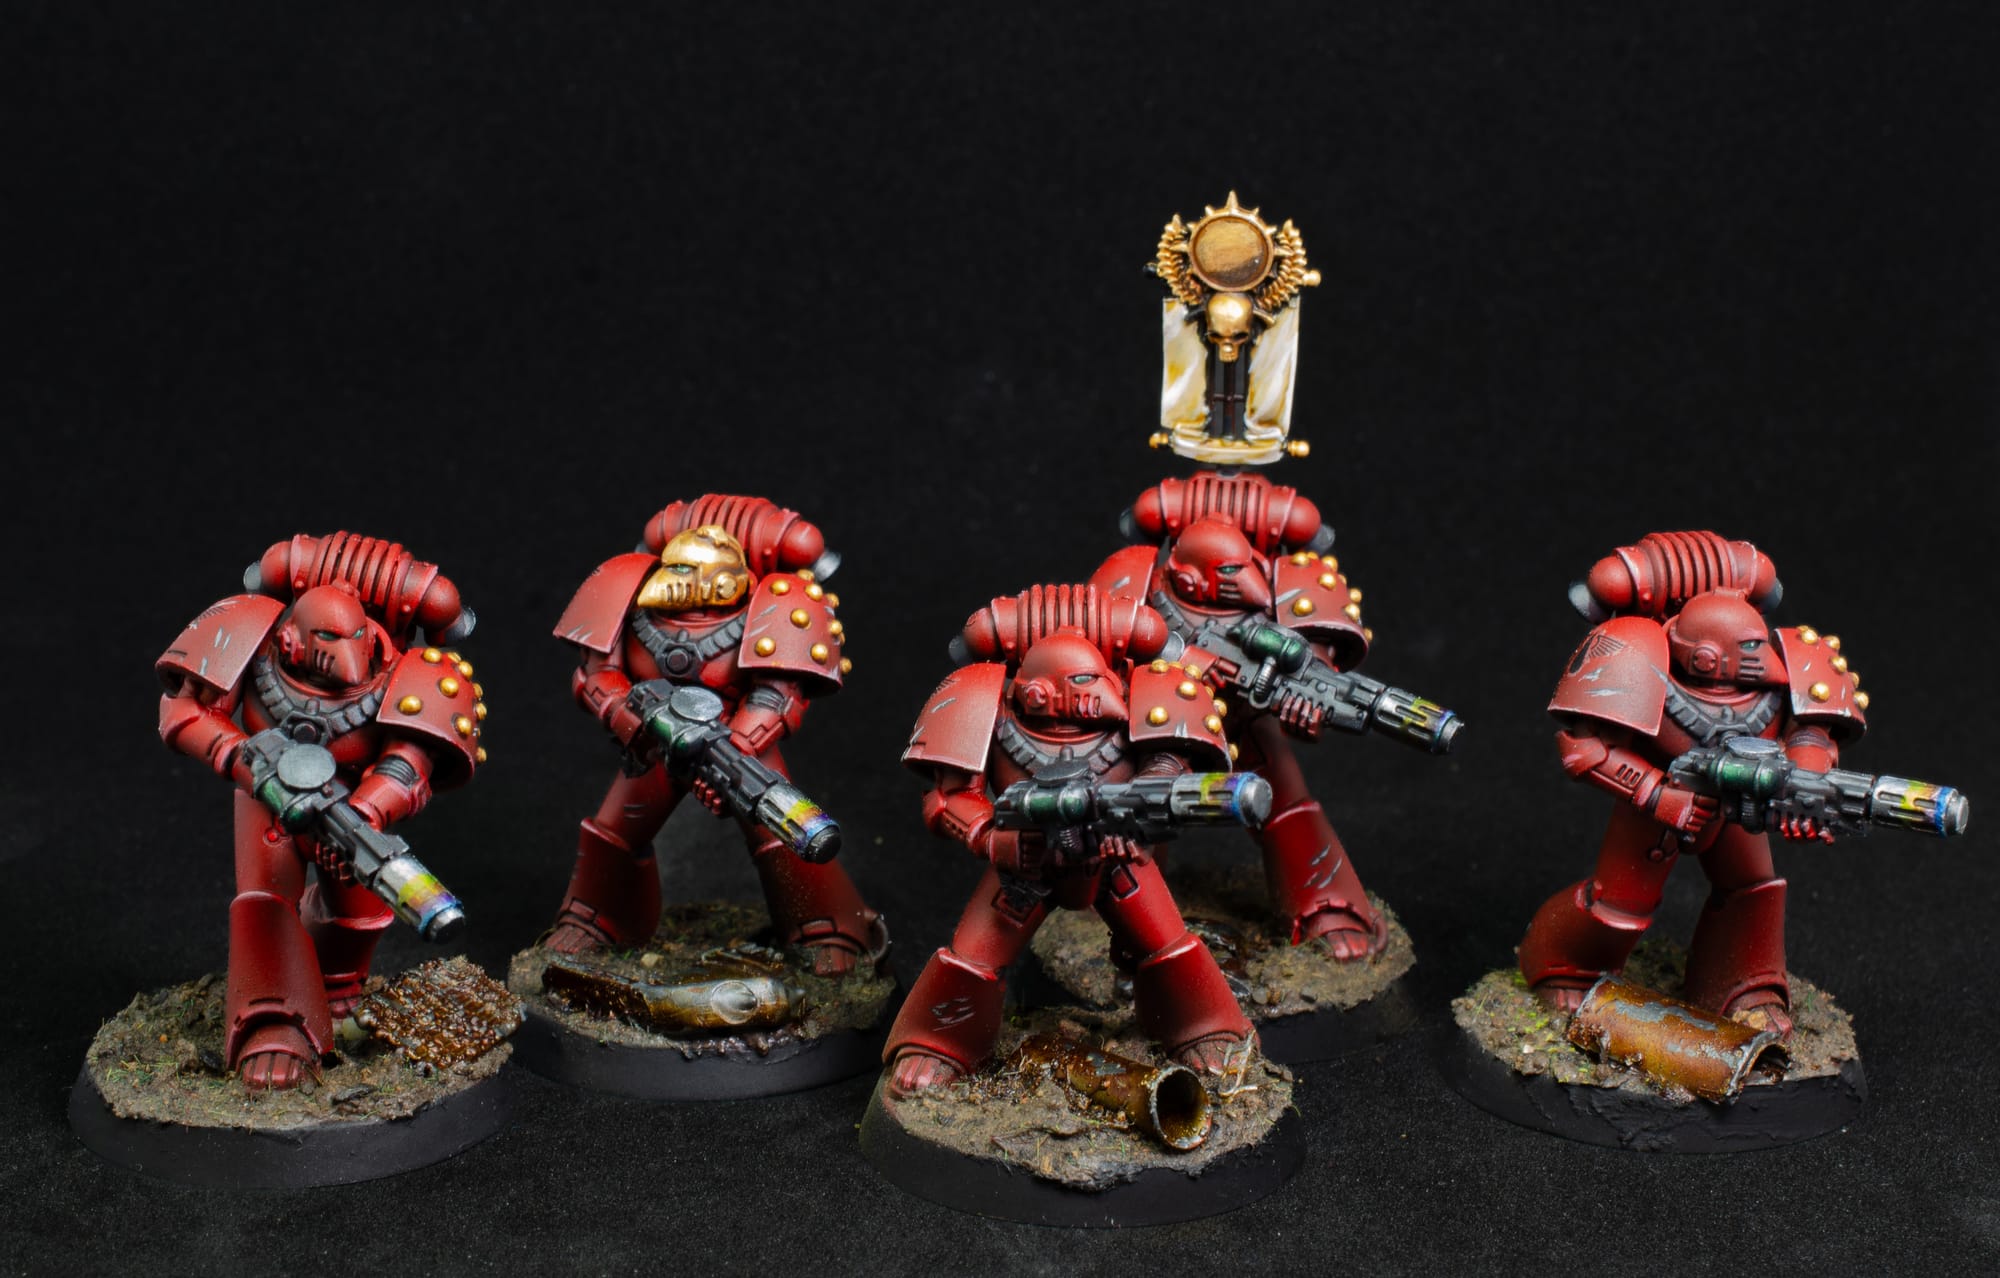
In this guide, I'll share my recipe and techniques for painting the IX Legion in Warhammer: The Horus Heresy, focusing on achieving rich red armour with the gold and black details.
Let's be clear from the beginning: I do use an airbrush for the red base layers. However, don't let that discourage you if you only have brushes! The color transitions are gentle enough that they can be replicated with brushes. I've actually missed spots while airbrushing and then matched the effect by hand. Take the blending as far as your skill and time allow.
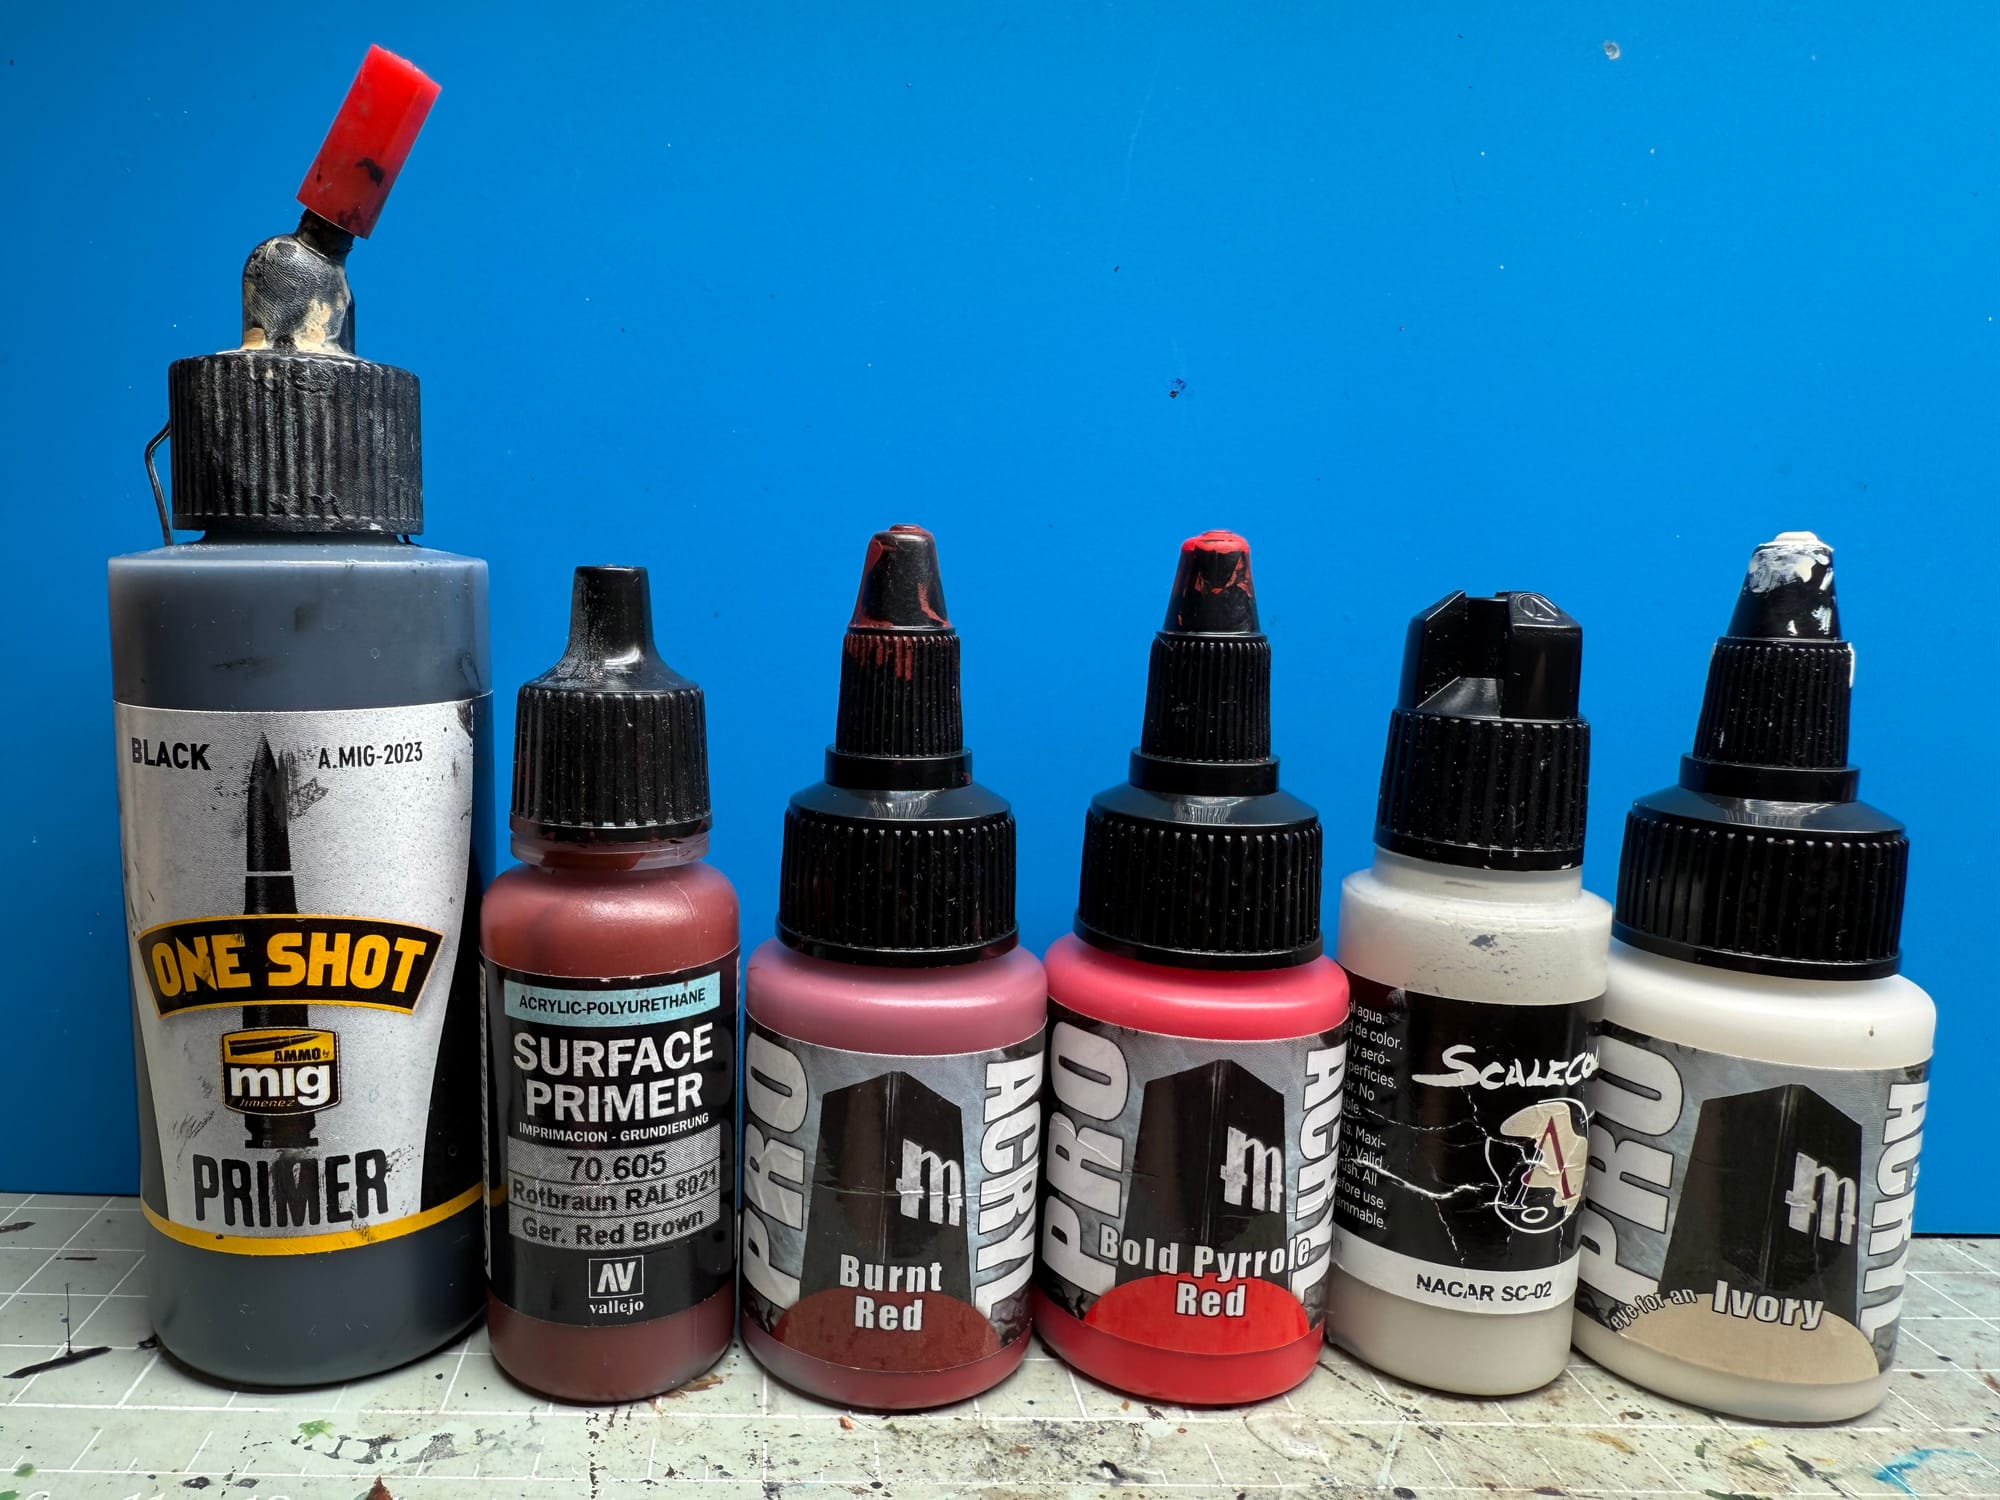
Black Primer Base
Start with a black primer to maximize shadow depth in all the recesses. This foundation is crucial for the rich, dramatic look we're after. Allow the primer to cure overnight for best results.
Red Brown Undercoat
Apply German Red Brown over the entire model, leaving only the deepest recesses and areas intended for black paint untouched. I use primer paint here (what I have on hand), but any regular paint matching RAL8021 "Rotbraun" works perfectly.
Pro tip: Colour choice at this stage is absolutely crucial for the final effect. I tried more plain browns and going over black straight. Rotbraun was what made the whole recipe work.
Dark Red Foundation
- Paint: Pro Acryl Burnt Red
- Technique: Apply smoothly, maintaining gentle transitions from the Red Brown undercoat
- Why this paint: Rich, dark red that handles beautifully with both brush and airbrush
Bright Red Highlights
- Paint: Pro Acryl Bold Pyrrole Red
- Technique: Build up highlights gradually, being bold with contrast while preserving transitions
- Important note: Colours will match more closely as they dry, so push those highlights more than you think you need to!
Gloss coat
Once satisfied with your red work, apply a gloss varnish. This serves two purposes:
- Makes waterslide decal application much easier. This especially important with very matte paints, such as Pro Acryl. And you have to worry less about your decal softener reactivating the paint, which tends to happen especially with thin airbrushed layers.
- Gloss creates a perfect surface for clean pin washing
Decals
Apply decals using standard decal softener techniques. After they've settled overnight, brush on another coat of gloss varnish to blend and protect them seamlessly.
Black Pin Wash
With the gloss coat in place, apply a black pin wash to all armor recesses using Citadel Nuln Oil. The gloss surface makes this incredibly easy and clean.
Alternative: Oil-based washes work excellently here and may be preferable if you're comfortable with them, though I prefer the speed of water-based washes for this application.
Matte coat
Airbrush matte varnish over everything to return to a workable surface.
Base Edge Highlights
Start with your bright red (Bold Pyrrole Red) along all armor edges.
Progressive Brightening
Build up brighter highlights by mixing red with beige:
- Primary choice: Scalecolor "Nacar"
- Alternative: Vallejo "Deck Tan"
Design choice: I deliberately avoid yellows and oranges here, preferring a cooler red palette.
Final Highlights
Push the sharpest edges and corners up to pure Ivory for maximum pop.
Weathering
For a weathered, campaign look:
- Paint scratches and chips with very dark brown
- "Highlight" each scratch with beiges and ivory to create realistic depth
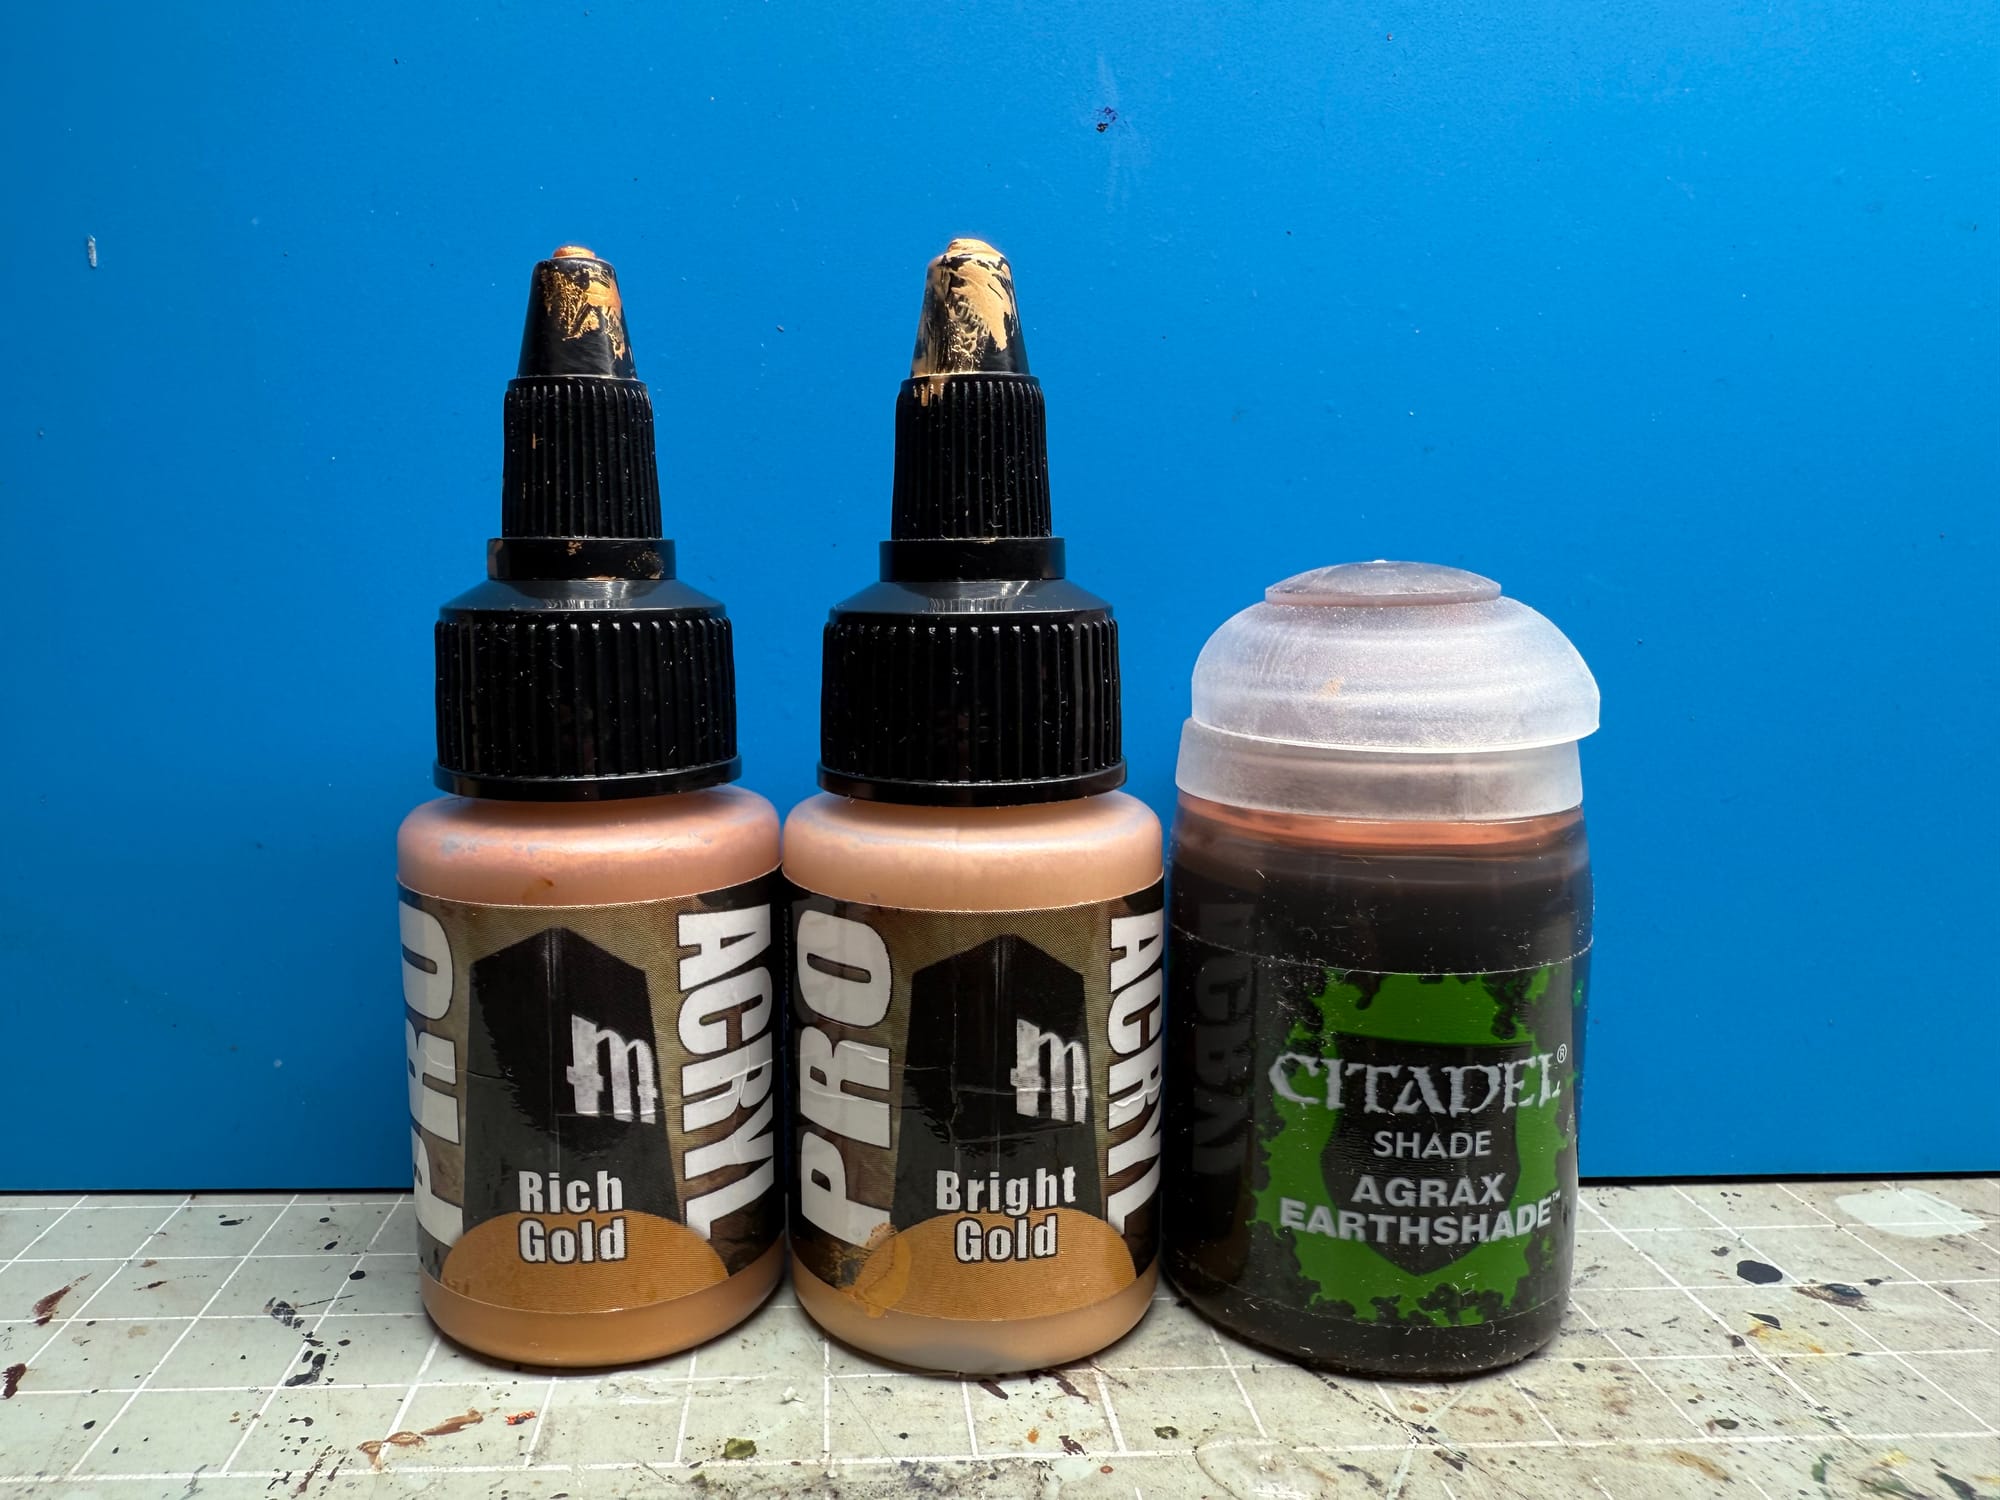
Gold
Keep the gold simple but effective:
- Base: Pro Acryl Rich Gold
- Wash: Agrax Earthshade (generous application)
- Highlights: Build back up through Rich Gold to Bright Gold
Blacks
The black elements are not the star of the show here. Keep them clean and simple:
- Base: Citadel Corvus Black or other very dark grey.
- Highlights: Progressive lighter greys for definition
Final steps
To finalise the model, apply a full matt varnish coat. Besides protection, the matt varnish will help to unify the colours and simply makes everything look and photograph better.
Thanks for reading! I hope you found this guide helpful for your own Blood Angels projects.
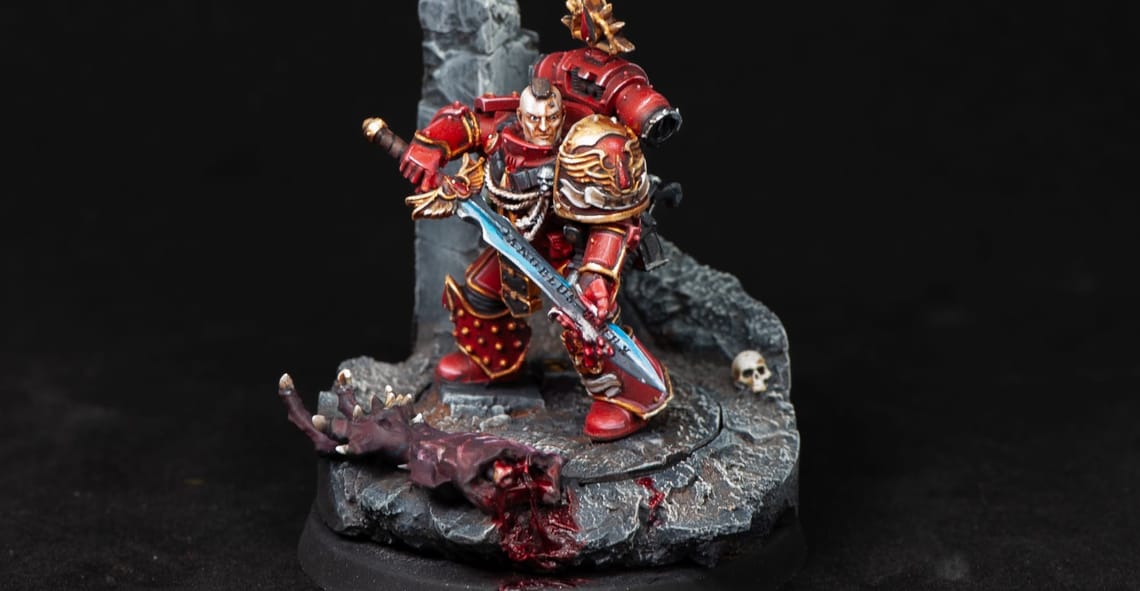
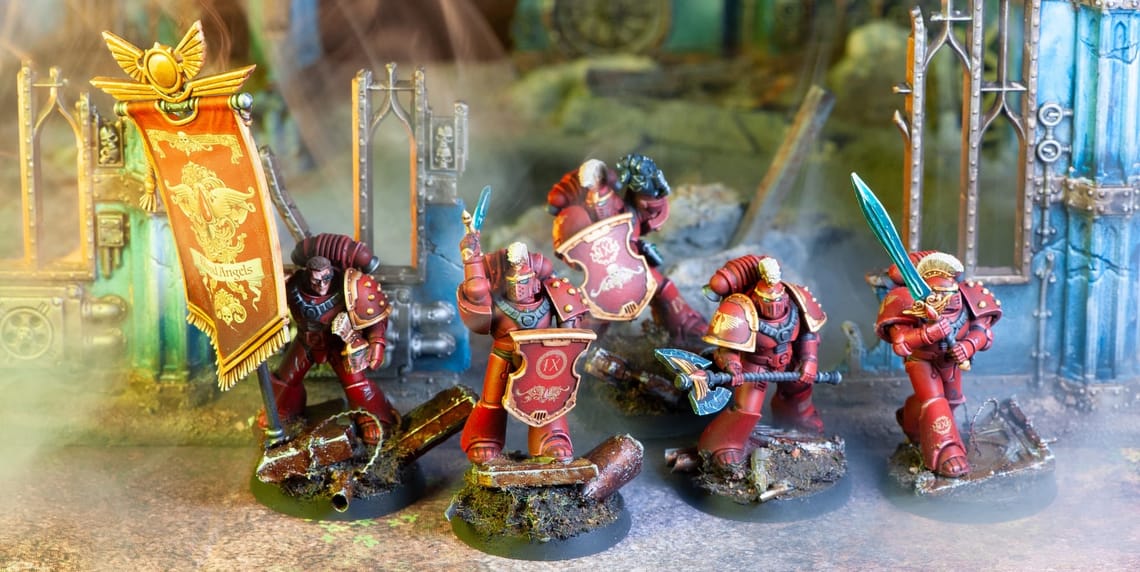
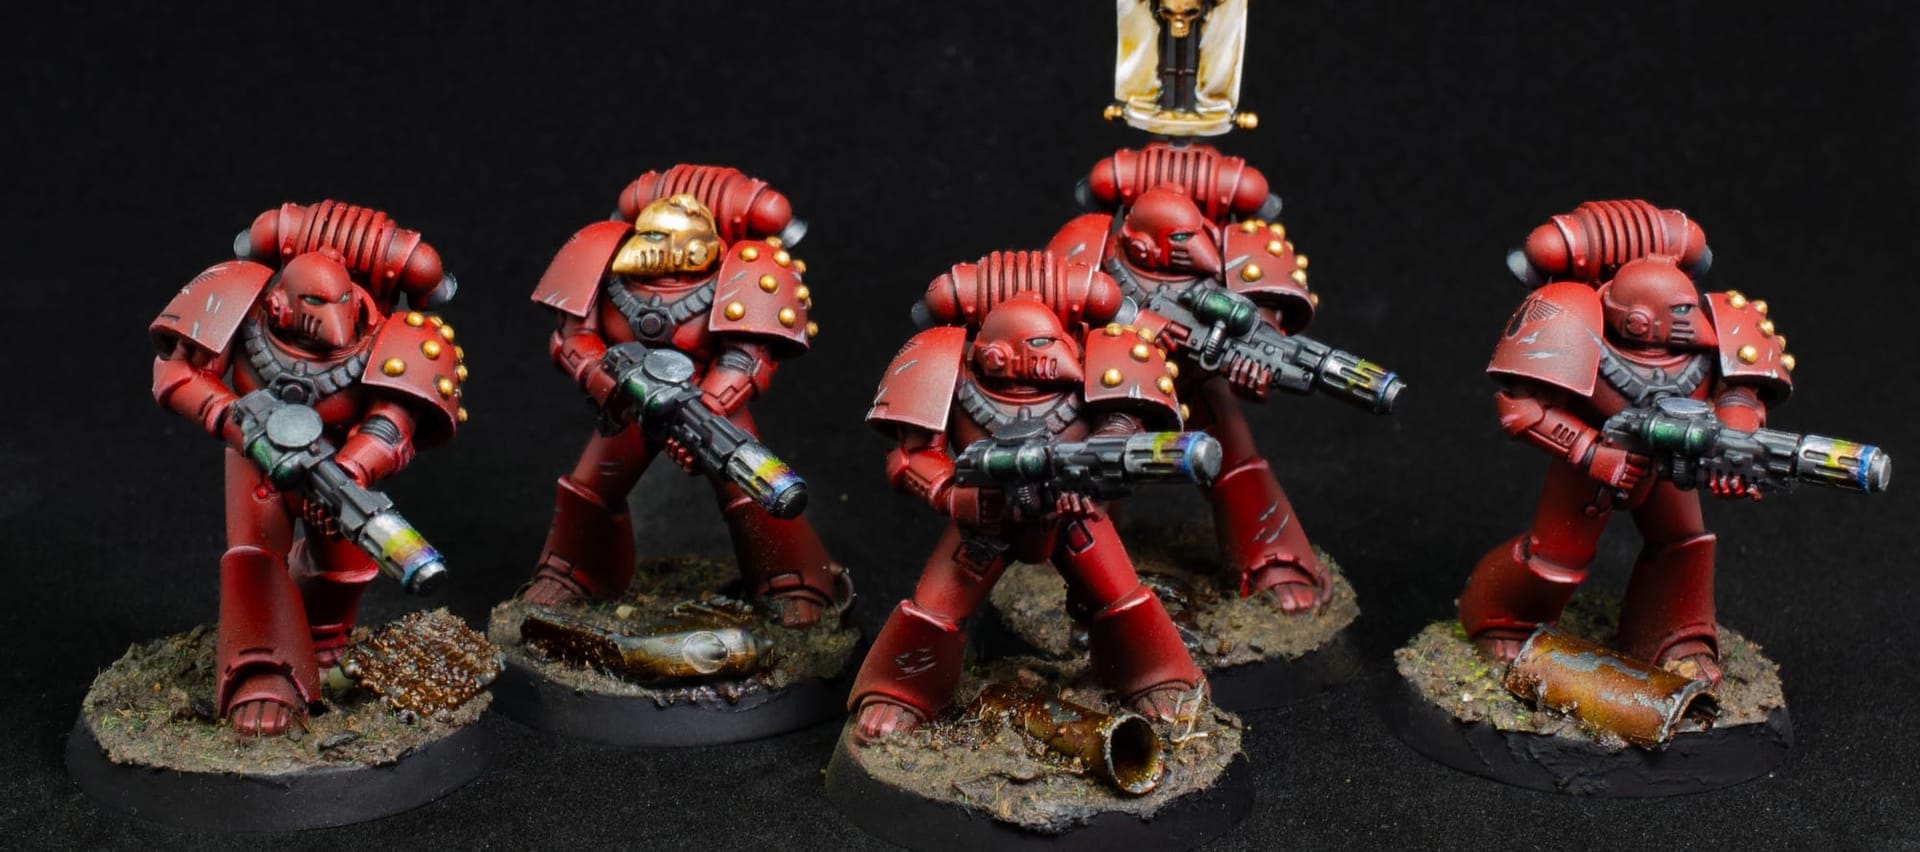
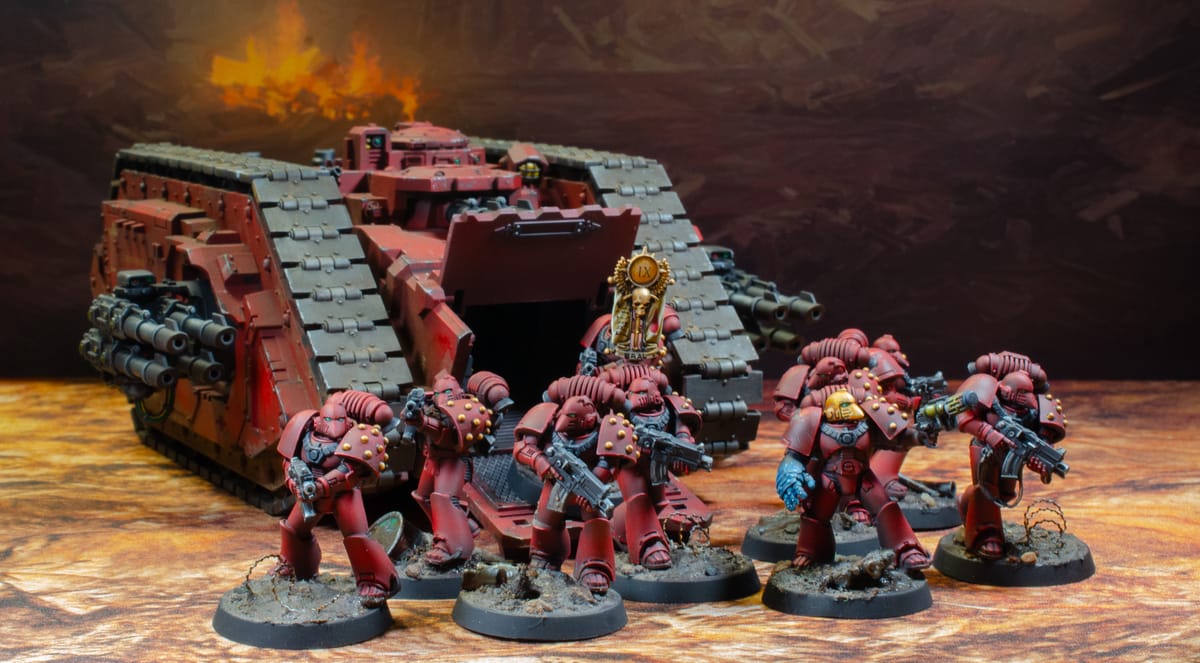
See the showcase section below for examples of completed models using this exact method:
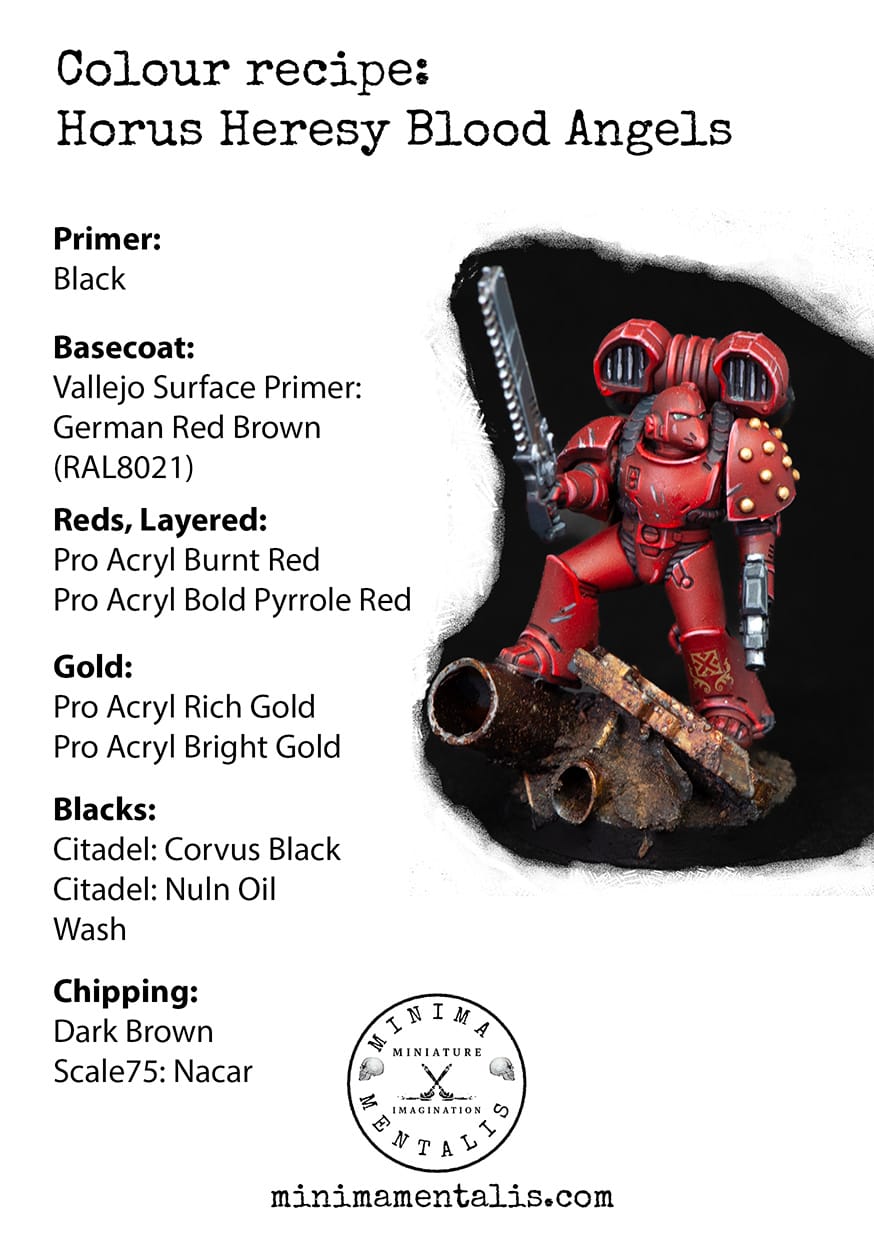
Here is a quick image reference , if you want to save the recipe or print it:
Paints reference:
- Black primer
- Vallejo Surface Primer: German Red Brown (RAL8021)
- Pro Acryl Burnt Red
- Pro Acryl Bold Pyrrole Red
- Pro Acryl Rich Gold
- Scalecolor "Nacar"
- Pro Acryl: Ivory
- Citadel Corvus Black
- Various greys
- Citadel Nuln Oil
- Citadel Agrax Earthshade
- Gloss varnish
- Matt varnish